FINAL POST FOR SUBMISSION - EMMA CHAN - z5309433
OVERVIEW
From weeks 5-10, we have undertaken the task of developing our own style. Through learning Photoshop, Illustrator and Fusion 360, we have been able to experiment with new digital softwares. The below images are a curation of my best process photos, sketches, Photoshop and Fusion 360 work. I have found that physical model making and drawing are my strong points in communicating my ideas across. I would like to further develop my skills in Photoshop and Fusion 360 in the future, as I feel they are invaluable ways to communicate a design in the real world.
(Image above) WEEK 9 - The_Space_Between exercise, which was about making your room with interconnected parts using Fusion 260. We were then required to separate these shapes and place them on a laser cut illustrator template.
(Image above) WEEK 8 - This was my first time using Fusion 360, and using our initials of our name we created a transformative shape as seen above. However my initials, ECC, have the same letter twice and did not create a very complex looking shape. Rendering the product using materials came next, and I selected Glass and Blue Aluminium, an effect I enjoyed looking at.
(Above Image) WEEK 8 - Using Photoshop, I was able to place real world materials onto my model that I had taken a photo of. I used shadows to try set my room in this landscape. I played with cobblestone materials on the exterior walls of my model. In the future, changing the colour of the lighting on the sliding doors and colour of the skylight would make this photo more realistic.
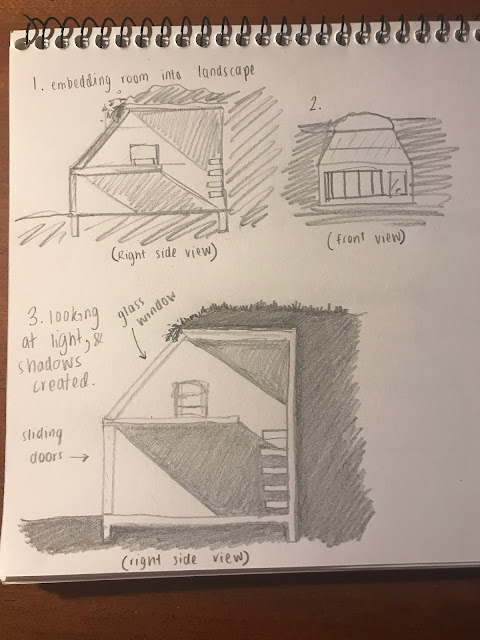
(above image) WEEK 9 - Hand-drawn sketches of my updated room. Looking at way light may enter the space, how to put a bed and a bookshelf on the second floor and a 3D view of my room. As well as looking at how the room may sit into the land.
(above image) WEEK 9 - Hand-drawn sketches of my existing room. The pop of colour in the tree is a good way to engage audience. Looking at the different elements which are present in my room and allowing analysis of the room. It was good to see how light comes into my room, and object placement in the room as well. The light sketch made me reconsider the amount of natural light access to my room, as my room is not dark yet only a little window allows for light.

WEEKS 5 - 10 - I love spiralling staircases and I would love to have one in my room. Through looking at a LEGO instruction manual, I was able to make a stacked spiralling staircase which is free standing. In my 5th model in my presentation, I showed the (left image above) staircase which I thought worked really well. I added drawn wooden planks to represent the wooden stairs.
(Image above) WEEK 7 - I wanted to experiment with putting a light source inside my model to show areas of glass. The glass is represented by the tracing paper due to its transparency. I still liked the idea of a garden rooftop which I attempted to show in this model.
(above image) WEEK 6 - 7 - This model was a good process model for me to look at how I wanted the room to be integrated with the landscape. I wanted the room to sit within the contours of the land. Reflecting on this model, helped me into a new direction with creating a garden rooftop. I was going to refine this model by creating a box to go over this model to act as a sloping hill. But I decided against due to time constraints and I felt the need to explore a new direction.
(Image above) WEEK 6 - My first model, I wanted to show the room potentially being between two landforms. An initial idea with no scale, purely just to look at the contours of the land and how a building might go between it.


